

How To Side Vent A Maytag Dryer
Side venting the clothes dryer: many lessons learned

This is non a contempo project, simply i that I've been pregnant to share because it might be helpful to others. When we bought our house, information technology came with an old schoolhouse washer and dryer in the kitchen. They took up almost the whole wall on the far side of the room. (Also check out that horrible false forest counter and backsplash. Those came out in short gild besides.)

Ane of our starting time large purchases for the firm was a new Samsung front-loading washer and dryer. Nosotros got a good deal on them from Lowes by using one of those coupons you get when yous change your address, plus i of those appliance sales they have several times a year. We had the installers stack them, which allowed u.s. to move our refrigerator from its original location just inside the kitchen doorway. That really opened upwards the room.
But there was a trouble. Isn't there always something? The back door to the house opens toward the washer/dryer, and I had measured them and knew they would fit and allow the door to open 90 degrees. What I didn't count on was that when the dryer is stacked on acme of the washer, it is actually set dorsum well-nigh 4 inches. Information technology doesn't look similar it is from the forepart, but that's because the top of the washing auto curves back at the peak. That meant that in social club to go out enough room behind the dryer for the vent, the washing auto had to stick out iv inches further than I had realized. And and then the back door couldn't open all the way, which was not a good affair. Argh!
I did some research and found out that while the default is for the vent to come out the dorsum of the dryer, it can also be configured to come out either side! Dandy, I idea, this will solve the trouble. Somehow I found out I needed a "side vent kit." I called Lowes to inquire about obtaining the side vent kit. Lowes told me to phone call Samsung. Samsung told me to use a Whirlpool side vent kit. I called Whirlpool and they told me to get the side vent kit from Lowes. I chosen Lowes once again and they told me to call Samsung or Whirlpool. Hmm. [Note: this was over two years ago, and there may at present be an bodily Samsung side vent kit, but I tin't vouch for information technology.] I looked around on the internet. I found the Whirlpool side vent kit on appliancezone.com and bought it. It took them over a month to send it to me even though they charged my credit carte du jour when I ordered it. Then after I discovered that the kit was non useful, which I'll tell you about in a minute. The only proficient affair about the side vent kit was that its i-canvas set of instructions correctly indicated that I would have to essentially disassemble the unabridged dryer (just didn't say how to exercise that) to access the internal venting and reroute information technology out the side.
Unfortunately, the regular user manual does not provide instructions or even enough information about the insides of the dryer to figure out how to detach it.I needed the service transmission. I found the service manual on several websites, but they were all charging an arm and a leg for it. I don't recall exactly how much, but I want to say in the ballpark of $40-50, which seems ridiculous. Shouldn't I be able to get a free copy of the service manual for an apparatus I just bought for a lot of money? Apparently not.Finally, I found a person/website that saved me: the Samurai Appliance Repair Man at applianceguru.com. I think I paid $v at the fourth dimension (looks like at present it's $10) for a 3-month "apprenticeship" (i.e., subscription), which entitled me to get every bit much forum communication and/or request any service manuals to washers, dryers, dishwashers, ovens, etc. I asked for the service manual to my dryer, and within a curt time the Samurai provided it in downloadable format! Well, technically not the one for my exact make/model, but it was almost identical. The Samurai Apparatus guy is providing a really helpful service at a reasonable cost. I'm a fan.
I was pleased nearly getting the service manual for but $5 instead of $50. I followed the directions in the service manual and started disassembling the dryer. Everything was just as the manual showed, and all went smoothly. Plain, unplug it first. So take off the door and front panels:

The blower encompass:

And the pulsate cover:

Next take of the drum belts and the entire pulsate comes out:


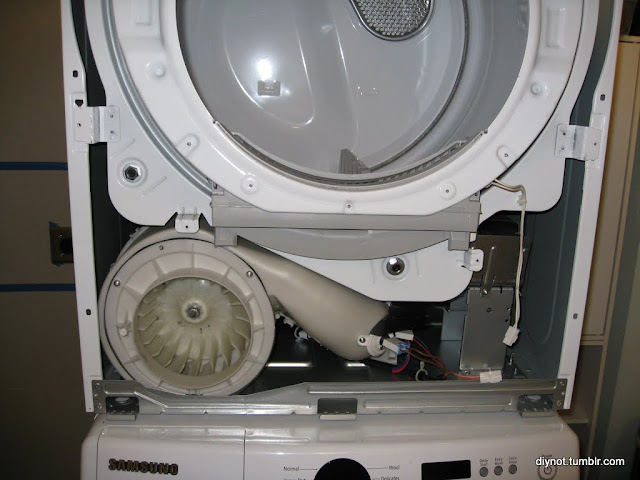
… exposing the inner duct, which is under the drum and behind the blower.Woohoo!
And then, disaster. The side vent kit was all wrong! The parts matched the inventory and instructions that came with the kit, only just made no sense in the context of the actual dryer. In one case the dryer was disassembled, it was articulate that at the very least a duct elbow would exist needed, and that fifty-fifty the straight pieces included were non useful. I wrote to Appliance Zone and told them that the kit doesn't take the correct parts, and asked for a replacement with the correct kit or else a refund. They refused to do anything any to rectify the state of affairs considering I didn't contact them within 10 days. Are you kidding? Information technology went dorsum and along several times, and I'll spare y'all the details, but let'southward just say I was extremely displeased with their "customer service" and two years later I notwithstanding hold a grudge. I will never buy annihilation from them once again, and you, dearest readers, shouldn't either. Rant over, back to the story.
I had blown some money on this overpriced and useless side vent kit. On a few DIY forums, several people recommended making your ain side vent kit from common duct parts plant at the local hardware store. Originally I had wanted to exercise it the "right" way by using a sanctioned kit, simply now that was off the tabular array. Plus my dryer was in pieces all over my kitchen and living room flooring. I made a quick trip to Home Depot and bought some 4-inch round rigid duct pieces: 2 directly and one elbow. Yep, that's information technology. Each piece was under $iv. I should accept merely done that in the beginning place. Information technology was so much easier and and then much cheaper than the kit, which I couldn't use for anything. While I was at HD, I also bought a semi-rigid duct with connectors similar to this to use on the outside of the dryer, since I didn't think too highly of the flimsy one used in the original installation.
Upon returning home, I had to make things up as I went forth since my kit didactics sheet was useless (bated from vaguely mentioning that the dryer had to be taken apart), and side venting was the one topic the service transmission didn't cover. Fortunately, there wasn't much possibility of doing it incorrect. The existing duct went from the blower direct out the dorsum of the dryer. The new duct conspicuously needed to become direct towards the dorsum, just then make a 90 degree plough to the left and get out the side instead. That was the merely possible way information technology could go from the blower to the knockout hole in the side. And then I cut my $4 straight pieces to the correct length and connected them with the elbow. I used the knockout from the side to comprehend the identical hole left in the back of the dryer, using foil tape to secure it. [Annotation: Do not use duct record on ducts and the like! Use foil record.] Hither'southward what the internal duct looks like for side venting:

I don't have photographic prove, but I think I must have put some foil tape on the duct connections likewise.
EDIT: Run into the admission panel in the back? Someone mentioned in the comments that you lot may be able to replace the ducting through that hole without having to take apart the whole dryer from the front! Genius! If you can maneuver through that pigsty, information technology will save a ton of time.
Then I put everything dorsum together, working astern through the manual. I had kept all the screws in separate containers with little notes so I wouldn't mix them up.

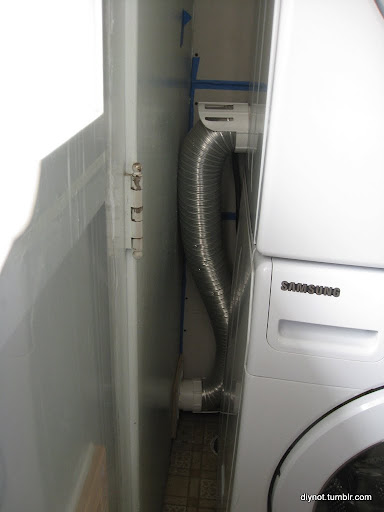
I fastened the semi-rigid duct to the outside using the connectors information technology came with. I chose that one because the plastic connectors protect the bendy parts from getting crushed. It's important for dryer vents to stay as smooth inside and uncrushed as possible, otherwise lint can accumulate unnoticed and become a fire hazard. The plastic connector also gave me something to attach the inner duct to.
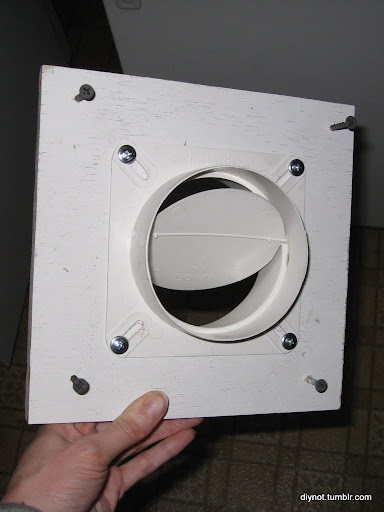
The hole in the drywall was too big, so I got Matt to cut a square of plywood with a right-sized hole in the center. The plywood covered the extra space around around the hole in the drywall and gave me something to securely screw the vent door into. I guess we already had the vent door shown (I don't know what information technology'southward chosen) along with this thing.
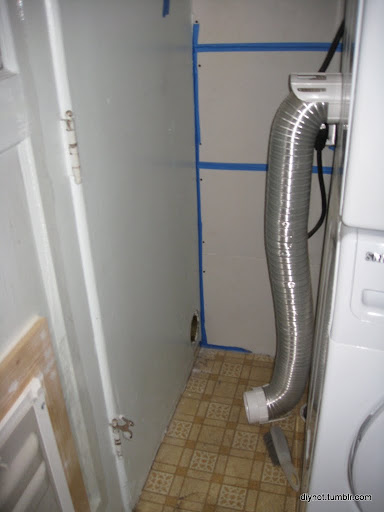
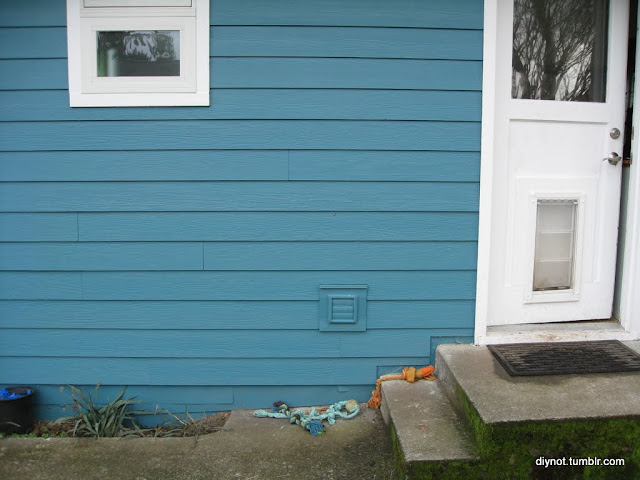
And here's what the finished production looks similar (meet how the vent can actually go behind the washing machine since it has a lot more room behind it than the dryer):
In conclusion, I spent:
- endless hours researching whether this could be done and how to do information technology;
- some more hours trying to rails down the (useless) side vent kit – though maybe there now exists a side vent kit that actually works;
- a few more than hours searching for the service manual before I came across the Samurai Appliance guy, for whose existence I am eternally grateful;
- about $twenty on things that really helped me do the project;
- more than $20 (I don't even want to tell y'all how much) on something that was totally useless.
And for all of that, I got:
- to motility my stacked washer and dryer back a whopping 4 inches,
- which allows the back door to my firm to open up 90 degrees instead of an unacceptable 70 degrees.
Was it worth it? Let's put information technology this way: if yous are because doing this, I would advise you exhaust (!) other options that don't require side venting. If you really need to do it, information technology can be done, and maybe my experience will help you. [Disclaimer: I do not know whether doing this yourself or even having a professional do it could void your warranty. I read somewhere this might exist the example, so I inquired nearly having it washed by Lowes and they said they wouldn't practice it. Continue at your own risk.]
I think in our case it was worth it. Side venting was the only thing that would allow our preferred kitchen arrangement, and the alternatives are vastly inferior. The dryer is currently only about an inch or then out from the wall, which is not plenty room for even something similar this periscope duct. Recessing the duct into the wall was also not an option because in that location is plumbing in the wall. Although there were frustrating moments forth the fashion, it was an interesting claiming for me, and I'chiliad proud that I persevered and got it done.
-Kelly
Source: https://diynot.tumblr.com/post/18134503806/side-venting-the-clothes-dryer-many-lessons
0 Response to "How To Side Vent A Maytag Dryer"
Post a Comment